deviceViewer
deviceViewer is a browser based application to manually test. The app allows users to test devices on different browsers. On a Windows machine, to connect the device with Mobile Labs Trust, enable the Mobile Labs Trust check box, otherwise the viewer will launch on a web based browser.
To connect to deviceViewer:- On the GigaFox Devices page, click the Connect button for the device to connect to.
To disconnect, close the deviceViewer window.
If the connection is lost during testing, reconnect by clicking the Start new session link on the lost session notification page. On click, the connection will launch with the previous specifications.
Components
Each connected device is displayed in its own browser window. To differentiate between devices, each display window is titled with the device's name.
Side Panel Menu

The following can be found on the side of the window:
Appium: Access to Appium inspector.
Applications: Opens the Applications panel. Select an application to install and launch it on the device.
Processes: Displays a list of processes and their active metrics. Metrics include:
| Name | The process name. |
| PID | Process ID- the ID of the process being run. |
| PPID | Parent Process ID- the process ID of the parent process responsible for the launch of the process. |
| CPU | The CPU percentage being used by the process. |
| RSS | Resident Set Size- the portion of memory occupied by a process held in main memory. |
| VSS | Virtual Set Size- all the memory the process can access, including memory that is swapped out and memory from shared libraries. |
| State | Codes that represent the state of the process: R: Running D: Uninterruptible sleep S: Interruptible sleep Z: Defunct/zombie T: Stopped |
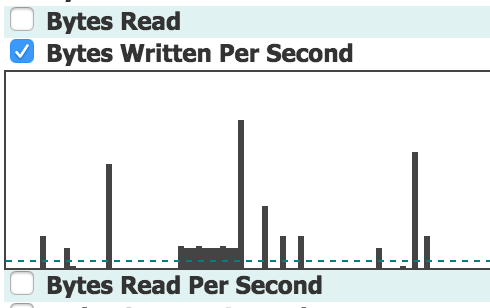
Samples: Displays Samples data broken down by Memory, CPU, Network, Disk, and Process. Enabling the checkbox next to the specific vital will display a real time graph or average information of the vital.
Accessibility: Opens the iOS deviceKey Accessibility panel.
Camera: When a simulated image is set, the device's camera will see the set image as though the lens is pointed at it. For more information on how to use the camera feature, click here.
Settings and Device Buttons
Rotate
Rotation
The rotate left and rotate right buttons will rotate the screen output by 90°.
The ... button will allow you to choose a specific display:
- Portrait
- Landscape Right
- Upside down
- Landscape Left
Paste
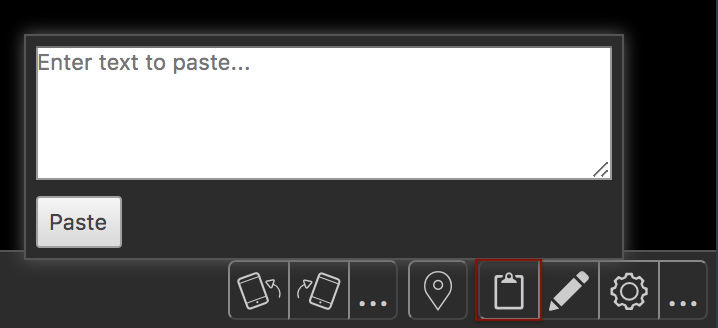
Use the paste feature, clipboard icon, to enter text on the device.
Alternatively, use the device's keyboard to enter text or cut and paste text onto the element.
Draw
On the deviceViewer, Draw mimics a device's touch input. In the Draw console, open by clicking on the pencil icon, use draw syntax to create custom gestures.
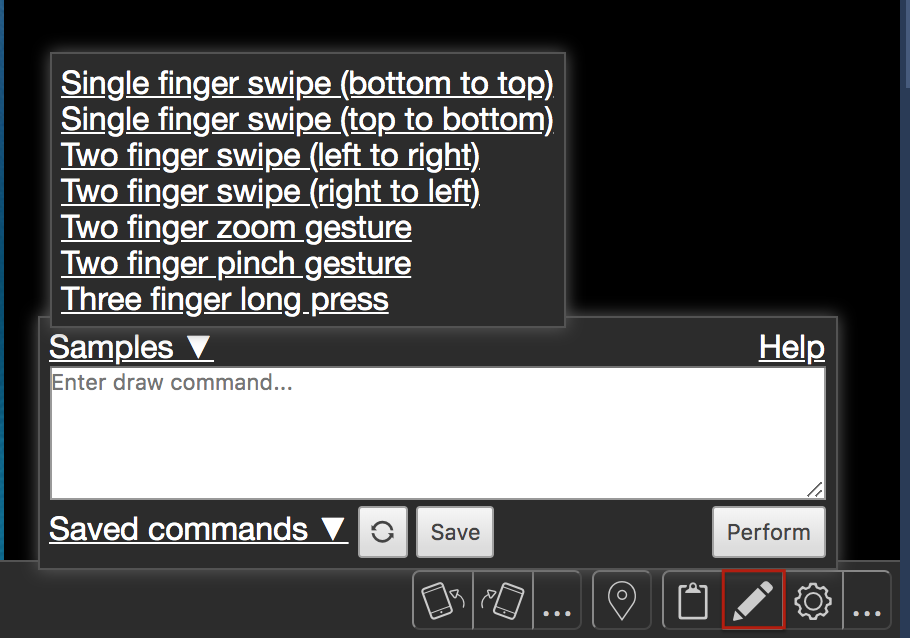
To run a gesture on deviceViewer, enter a draw command and click
Perform.
On the console:
- Samples include pre-written draw commands. Select a command and click Perform to run the command.
- Help directs to the Draw syntax page.
- Saved commands includes a list of previously saved local or global commands.
- Refresh will update the saved commands lost.
- Save will save a draw command for future
testing. Commands can be saved locally or globally.
To save a command: - Enter a draw command.
- Click Save.
- Enter a name for the command and click OK.
- To make a command visible to other users, on the Make this command global so all users can see it? prompt, click OK, otherwise Cancel will save the command locally.
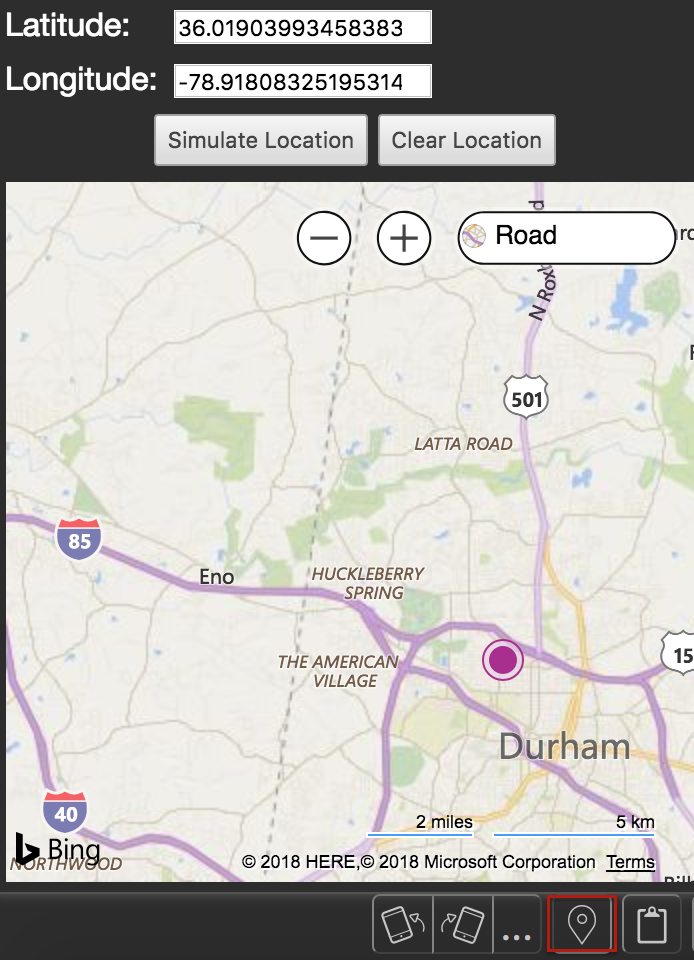
Mock Location
Mock Location sets a device to a simulated device location. The console is available by clicking the drop location pin button on the deviceViewer toolbar.
To set a simulated location:
- On the location console, select a location on the map (the latitude and longitude will automatically update with the location's information) and click Simulate Location.
- Manually enter the latitude and longitude and click Simulate Location.
Or
On the console:
- Clear Location: Resets the device's simulated
location to the actual location.
NOTE: Clear Location will update the device's location, but does not clear the latitude and longitude values of the previous simulated location.
- Map View: By default, the map is set to
Road view. Alternatively, the map can be set to
Aerial and Street side views.
To change the map view, hover over the view's name to display view options and click on the desired view. - Zoom: Use the + and - signs to zoom in and out on the map.
Audio Controls
Devices that have already been configured to play sound will display a mute sound icon as part of the control panel.
To turn audio on, click the mute sound icon. Once audio is enabled, the volume can be increased or decreased with the volume slider.

Settings
Through the settings feature, the cog button, view the device's Display Quality, Notes, and Connection Information.
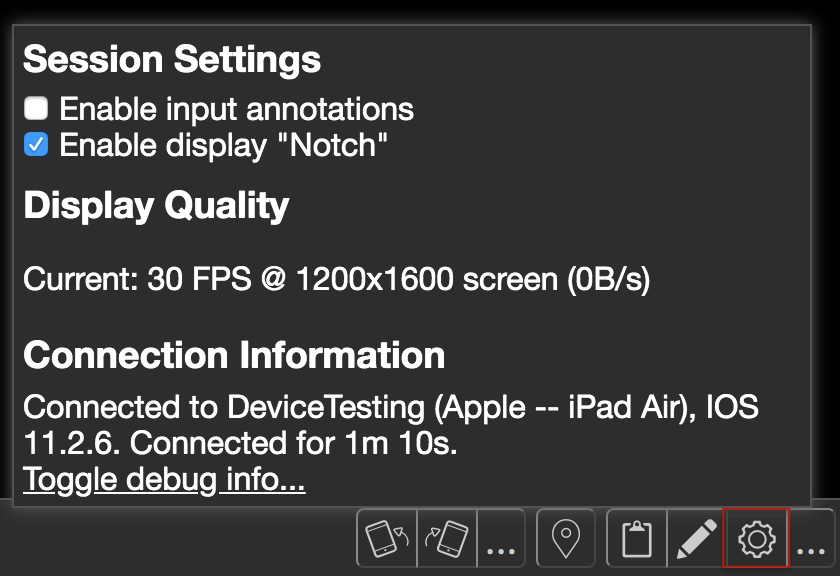
Under Session Settings, enable or disable
- input annotations: highlight keyboard and touch inputs at the location of the input by displaying a highlighted circle.
- the iOS device "Notch": display the iPhone X
notch at the top of the deviceViewer.

Additional Actions
- Download screenshot: Downloads a screenshot image of the webViewer.
- Display mode: Switch between GigaFox's slower and faster streaming display modes.

Fit to Screen
When manually adjusting the screen, a fit to screen
icon appears. Click it to adjust the browser screen.
![]()
Testing Features
Touch Input
Touch input mimics the actions a device supports including gesture, swipes, taps, and zooms.
Single swipe gesture
For a single swipe gesture with a mouse, hold down the left mouse button and move the mouse.
For a single swipe gesture on a trackpad, hold down the trackpad and use a different finger to swipe.
Multi swipe gesture
For a multi touch gesture with a mouse, hold down the control key, left mouse button and move the mouse.
For a multi touch gesture on a trackpad, hold down the control key, click on the trackpad.
Pinch and Zoom
For a pinch and zoom gesture with a mouse, click the left mouse key, command and control key.
For a pinch and zoom gesture on a trackpad, click the trackpad, hold down the control and command key.
When also holding down the shift button, the gesture will mimic the one finger gesture.
NOTE: iOS devices will display a red line to indicate the gesture and will turn green as the gesture is performed.